
As a seasoned supplier of lawn mowers, I've witnessed firsthand the importance of proper maintenance to keep these machines running smoothly. One crucial aspect of lawn mower maintenance is adjusting the tension of the drive belt. A correctly tensioned drive belt ensures efficient power transfer from the engine to the cutting blades or wheels, preventing slippage and premature wear. In this blog post, I'll guide you through the process of adjusting the drive belt tension on a lawn mower, sharing my expertise and insights gained over the years.
Understanding the Drive Belt
Before diving into the adjustment process, it's essential to understand the role of the drive belt in your lawn mower. The drive belt is a flexible, looped component that connects the engine's pulley to the pulleys on the cutting blades or wheels. As the engine rotates, the belt transfers power, allowing the blades to spin and the wheels to move. Over time, the belt can stretch or loosen, leading to reduced performance and potential damage to the mower.
Tools You'll Need
To adjust the drive belt tension on your lawn mower, you'll need a few basic tools:


- Socket Set: This will be used to loosen and tighten the bolts that hold the belt in place.
- Wrench: A wrench may be necessary to adjust the tensioning mechanism, depending on your mower's design.
- Screwdriver: You may need a screwdriver to remove any covers or panels that provide access to the drive belt.
- Safety Gear: Always wear safety goggles and gloves to protect yourself from moving parts and debris.
Step-by-Step Guide to Adjusting Drive Belt Tension
Step 1: Prepare Your Lawn Mower
- Turn off the engine and allow it to cool completely. This will prevent any accidental starts or burns during the adjustment process.
- Disconnect the spark plug wire to ensure the engine won't start while you're working on the mower.
- Remove the cutting blades or any other attachments that may interfere with your access to the drive belt.
Step 2: Locate the Drive Belt
- Refer to your lawn mower's user manual to find the location of the drive belt. In most cases, it will be located under a cover or shroud near the engine.
- Use a screwdriver to remove the cover or shroud, exposing the drive belt and the tensioning mechanism.
Step 3: Check the Belt's Condition
- Inspect the drive belt for signs of wear, cracking, or damage. If the belt is severely worn or damaged, it should be replaced before adjusting the tension. A worn belt may not hold tension properly, leading to poor performance and potential safety hazards.
- Check the belt's alignment on the pulleys. Make sure it is seated correctly and not rubbing against any other components.
Step 4: Loosen the Tensioning Mechanism
- Locate the tensioning mechanism, which is typically a bolt, nut, or spring-loaded device. Use the appropriate socket or wrench to loosen the tensioning mechanism, allowing the belt to become slack.
- As you loosen the tension, pay attention to the movement of the belt and the tensioning device. Some mowers may require you to hold the tensioning mechanism in place while you adjust the belt.
Step 5: Adjust the Belt Tension
- Once the belt is slack, measure the tension using a belt tension gauge. If you don't have a gauge, you can use the following method: Press down on the belt with your thumb at a point midway between two pulleys. The belt should deflect about 1/2 to 3/4 inch.
- If the belt is too loose, adjust the tensioning mechanism to increase the tension. Turn the tensioning bolt or nut clockwise to tighten the belt. If the belt is too tight, loosen the tensioning mechanism by turning the bolt or nut counterclockwise.
- Make small adjustments and recheck the tension until it falls within the recommended range. Remember that over-tightening the belt can cause excessive wear on the pulleys and bearings, while under-tightening can result in slippage and reduced performance.
Step 6: Recheck the Belt Alignment
- After adjusting the tension, visually inspect the belt to ensure it is still properly aligned on the pulleys. If the belt has shifted or is not seated correctly, gently guide it back into position.
- Rotate the pulleys by hand to check for smooth movement. The belt should move freely without any binding or rubbing against other components.
Step 7: Tighten the Tensioning Mechanism
- Once you're satisfied with the belt tension and alignment, use the socket or wrench to tighten the tensioning mechanism securely. Make sure the bolt or nut is tightened to the manufacturer's specifications.
- Double-check the belt tension one last time to ensure it hasn't changed during the tightening process.
Step 8: Reinstall the Covers and Attachments
- Replace the cover or shroud that you removed earlier, using the screwdriver to secure it in place.
- Reinstall the cutting blades or any other attachments that you removed. Make sure they are properly tightened and aligned.
Step 9: Test the Lawn Mower
- Reconnect the spark plug wire and start the engine. Let the mower run for a few minutes to allow the belt to settle into its new tension.
- Engage the cutting blades or drive wheels to test the mower's performance. Pay attention to any unusual noises, vibrations, or slipping. If you notice any issues, stop the mower immediately and recheck the belt tension and alignment.
Tips for Maintaining Proper Drive Belt Tension
- Regular Inspections: Check the drive belt tension regularly, especially at the beginning of the mowing season and after extended use. A quick inspection can help you catch any issues early and prevent further damage.
- Keep the Belt Clean: Dirt, grass clippings, and debris can accumulate on the drive belt, causing it to slip or wear prematurely. Use a brush or compressed air to clean the belt and pulleys regularly.
- Store Your Lawn Mower Properly: When not in use, store your lawn mower in a dry, protected area. Excessive moisture and temperature fluctuations can cause the belt to deteriorate over time.
- Replace Worn Belts Promptly: If you notice any signs of wear or damage on the drive belt, replace it as soon as possible. Using a worn belt can lead to poor performance, increased fuel consumption, and even damage to other components of the mower.
Explore Our Lawn Mower Range
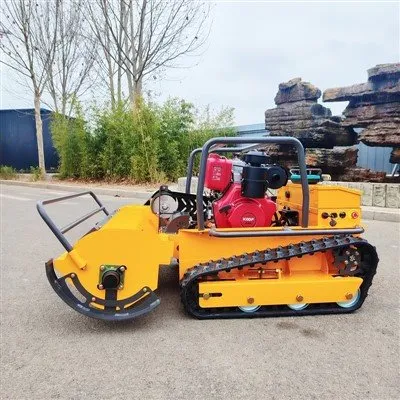
At our company, we offer a wide range of high-quality lawn mowers to suit every need and budget. Whether you're looking for a A Remote Control Lawn Mower, an Agricultural Wheeled Lawnmower, a Tracked Lawnmower, a Compact Lawn Mower, or a Small Self-propelled Lawnmower, we have the perfect solution for you.
Contact Us for Procurement
If you're interested in purchasing a lawn mower or have any questions about our products, please don't hesitate to contact us. Our team of experts is here to help you find the right mower for your needs and provide you with the support and guidance you need to keep it running smoothly. We look forward to the opportunity to work with you and help you achieve a beautiful, well-maintained lawn.
References
- Lawn Mower User Manuals
- Industry Best Practices for Lawn Mower Maintenance